It's already in the middle of november. Seems like time run faster than i thought. And i have soooo many waiting lists for my blog post. Because my internet connection down really often this last couple days but in the other hand i kept making nailarts, so that's why it happened -___-
For this post, i just choose randomly from my 'upcoming post' folder.. and ta-daaa! My polkadots nails post was choosen. So here it is!
If you see this post you may think it's just a common dots with pastel colours just like what i usually did. But if you notice, i make the dots and the base colour by some pastel colours. Not only one or two but three, baby pink, lilac, and white. As far as i can remember, i've never did something like this before. And this time, i make the dots smaller than what i always did. Do you realize it? :D
Here they are my baby-mani for my november, polkie-dolkie!
I make this mani as simple as.. it's like.. umm how to say it? The point is this time i want to make a really simple mani but i still can enjoy the colour and how the dots perfectly spreaded on every nail. And i think i did it, because i can stand with this mani for couple days (almost more than a week) without thinking to change it.. hehehe
Because sometime, the most precious design is the simplest one. It's not about how much you spent for the polishes, or how complicated your design is.. it's all about the happy and joy feeling everytime you make your nails. It's too priceless to be payed with anything ;)
Tampilkan postingan dengan label vintage nailarts. Tampilkan semua postingan
Sabtu, 17 November 2012
My Polkie Dolkie November
This post is
2012 nail
,
dots nailart
,
korean style nails
,
love nails
,
nailarts
,
pastel color nailarts
,
polkadots nailart
,
vintage nailarts
,
vintage nails
Kamis, 11 Oktober 2012
Cross Cross by Check Check
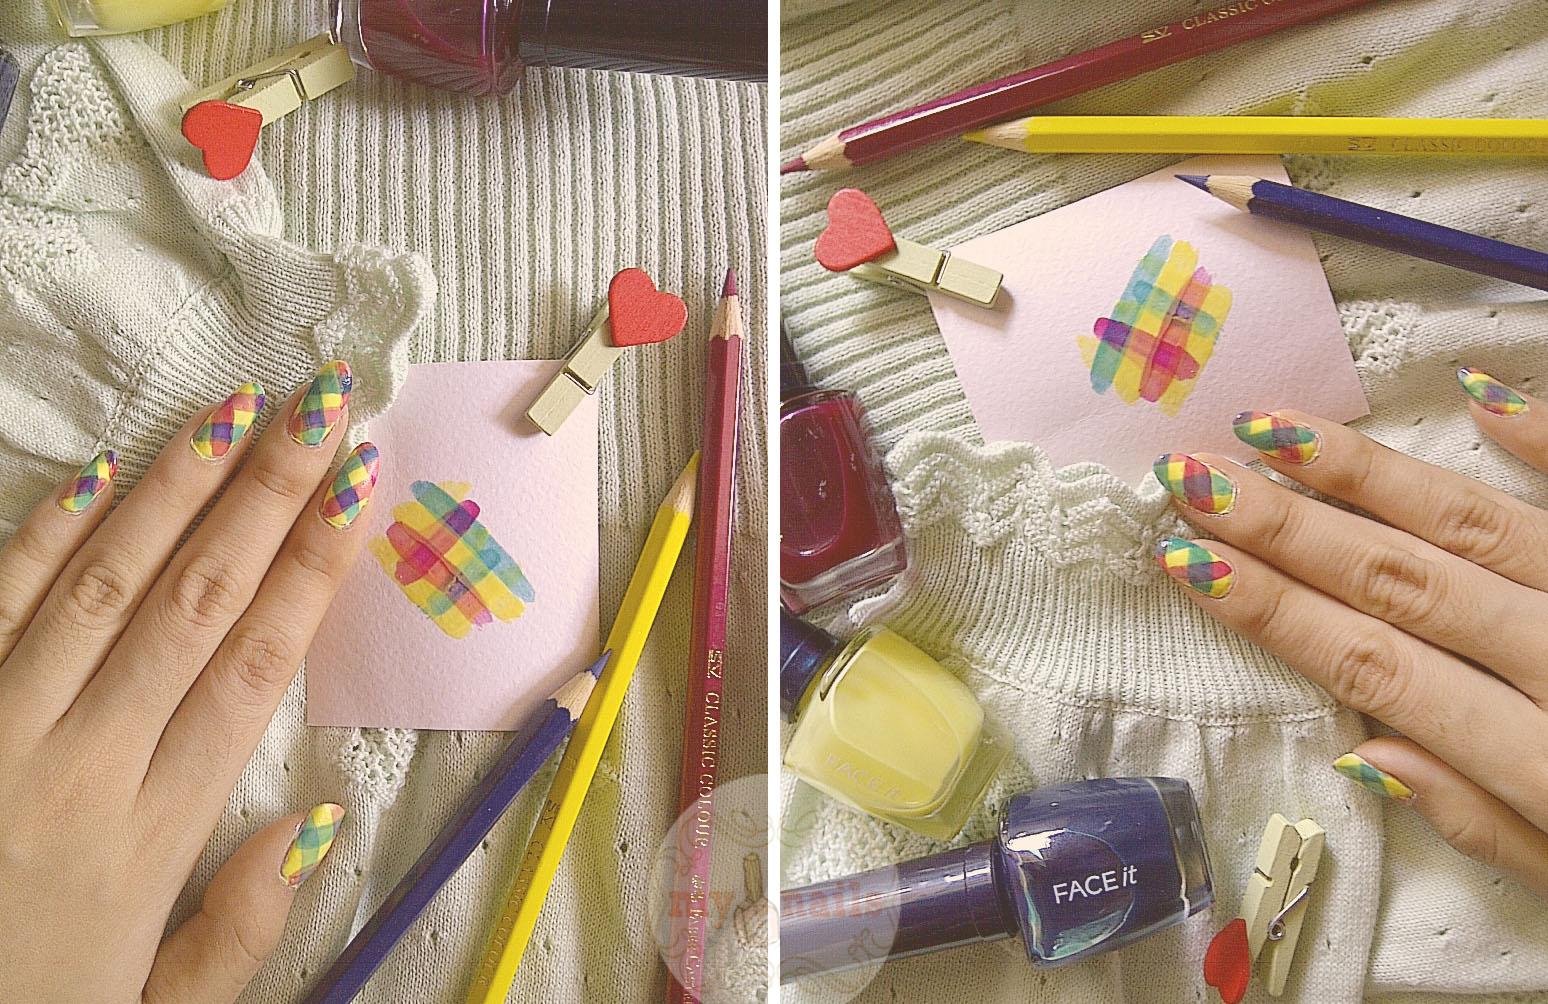
Last month my friend celebrated her 21st birthday and her friend gave her a set of Check Check Nail Kit by Face Shop.
Ew so lucky! And she got confused how to make a nail-art by those transparent nail polishes.
That's why yesterday she brought it up with her when she came and sleep-over at my home.
And after check the whole package of it, we could find the user guide there. Just right behind the package -__-
Because it was also the first time for me to make that kind of nail-art (okay it's nail-painting again also) and also the first time i was using that kind of nail polish. I've never used any kind of transparent nail polish before.
So i was just following the guide. It's my nails, Icha's, and also Tiki's nails that became my experiment last night.
But yeaaaay, i did it (almost) well. It looks good but a little bit awfull in some parts. You should know how hard it was to make the crossing patterns.
And it was really late when i tried to paint those nails, the hardest part was when i had to hold my drowsiness huhu
Luckily, the nails were done well!
Happy birthday again, Icha! Maybe it was my personal birthday gift for you, special nail-art, made with full of struggle! :p
And as always, i also make the step-by-step but i dont think it's clear enough. I just hope you can understand and try the better one on your nails :)
before you start the steps, i remind you that i was using white nail polish as the base colour so the transparent colours look better.
1. apply the colour line by line. it takes so much patient so i hope
you have thousands of it to make the straight one.
2. make an opposite directioned line after the base colour dried.
3-4-5. make the other opposite directioned lines on it until the whole base lines covered.
DONE!
p.s. it was really hard to make my right nails with my left hand. pffftt
This post is
2012 nail
,
bloggers
,
friends
,
korean style nails
,
nail arts
,
nailarts
,
october nails
,
pastel color nailarts
,
pastel nailarts
,
vintage nailarts
Jumat, 05 Oktober 2012
Play With Colours: Nail Painting Addiction Continues
Hello October!
time flies faster than i thought, seriously, seems like it's just yesterday i celebrate my 21st birthday hahaha
and it's october already now.
Lately, i really love to play with colours and paint em on my nails without stickers or anything like that.
and this time i also make a nailart-painting or you can call it nail-painting.
i still use some pastel colours (as usual) and use black nail polish for some firmly touches.
maybe if you already read my previous post you may find the identical post with this one,
the post tittled 'Tell Me Your Wish', where i make a pastelized nail-painting with pastel colours too but no black, i was using white dots to combine the colours.
soooo, to make it different with that post, i decided to use the different colours and black touch here..
Curious?
Let's play with colours!
Step-By-Step :
(you can see it at the previous post anyway, you can see it here also --> Tell Me Your Wish)
So, how are they?
Which one do you prefer, the one with white dots or black dots?
I think i love both of them, it's always hard for me to choose which one is my favorite from the whole nailarts i've ever made :p
But honestly i love how i play with the black colour.
i feel different with the previous one, it looks stronger, firm, and kinda vigorous heheheh
so, do you dare to play with the colours on your nails too? ;)
time flies faster than i thought, seriously, seems like it's just yesterday i celebrate my 21st birthday hahaha
and it's october already now.
Lately, i really love to play with colours and paint em on my nails without stickers or anything like that.
and this time i also make a nailart-painting or you can call it nail-painting.
i still use some pastel colours (as usual) and use black nail polish for some firmly touches.
maybe if you already read my previous post you may find the identical post with this one,
the post tittled 'Tell Me Your Wish', where i make a pastelized nail-painting with pastel colours too but no black, i was using white dots to combine the colours.
soooo, to make it different with that post, i decided to use the different colours and black touch here..
Curious?
Let's play with colours!
Step-By-Step :
(you can see it at the previous post anyway, you can see it here also --> Tell Me Your Wish)
So, how are they?
Which one do you prefer, the one with white dots or black dots?
I think i love both of them, it's always hard for me to choose which one is my favorite from the whole nailarts i've ever made :p
But honestly i love how i play with the black colour.
i feel different with the previous one, it looks stronger, firm, and kinda vigorous heheheh
so, do you dare to play with the colours on your nails too? ;)
This post is
2012 nail
,
korean style nails
,
nail goddess
,
nailarts
,
october nails
,
pastel color nailarts
,
pastel colored nailarts
,
the nail saloons
,
vintage nailarts
,
vintage nails
Sabtu, 22 September 2012
Mr. Tuxedo and Ms. Collar
My nails are oftenly seen with many kinds of cute and colourful nailart .
but it's very rarely for them to look neat and classy.
wait, neat and classy? like what? dressed em with shirt and gave it a little touch of expensive perfume maybe? hahahaha
NO, NO! i would not spray expensive perfume on my nails. And would not put any clothe on it, but what would i do with them?
much better than that, i'll put tuxedos and collar-ed dress with some buttons.
what would they look like?
anyone curious with this romantic couples on my nails?
here they areeeee.. Mr. Tuxedos and Ms. Collars are classy enough to be all matchy matchy and walking along enjoying their-nowhere-dates :D
Some people questioned the pink-touch on my Tuxedo and Collar nails, like, why pink? suchan annoying pink why dont you just use black and white only, and my favorite question, where do you get the idea to put that pink color as the buttons and bows?
If you are really curious with that, lemme explain that..
that pink touch for the Tuxedos i got from one of SNSD Paparazzi costumes, when they wear black and white tuxedo then they have the shocking pink gloves, that's inspire me to put some pink touches for the black and white combinations.. (do you understand now? the point is snsd will always inspire me :p) hehehehe
And now, as usual, i've made some step-by-step-wanna-be tutorials for you girls..
sorry if my step-by-step making never get any better each post hahaha
i really have no idea how to make it clear enough to be followed :p
TUXEDO STEP by STEP
COLLAR STEP by STEP
are they clear enough so you can make it also at home, girls? i hope so.. i really have nooo idea how to make the better one -_____-
so, have your nails neat and classy enough for their date? good luck on making your own Mr. Tuxedo and Ms. Collar :)
but it's very rarely for them to look neat and classy.
wait, neat and classy? like what? dressed em with shirt and gave it a little touch of expensive perfume maybe? hahahaha
NO, NO! i would not spray expensive perfume on my nails. And would not put any clothe on it, but what would i do with them?
much better than that, i'll put tuxedos and collar-ed dress with some buttons.
what would they look like?
anyone curious with this romantic couples on my nails?
here they areeeee.. Mr. Tuxedos and Ms. Collars are classy enough to be all matchy matchy and walking along enjoying their-nowhere-dates :D
Some people questioned the pink-touch on my Tuxedo and Collar nails, like, why pink? suchan annoying pink why dont you just use black and white only, and my favorite question, where do you get the idea to put that pink color as the buttons and bows?
If you are really curious with that, lemme explain that..
that pink touch for the Tuxedos i got from one of SNSD Paparazzi costumes, when they wear black and white tuxedo then they have the shocking pink gloves, that's inspire me to put some pink touches for the black and white combinations.. (do you understand now? the point is snsd will always inspire me :p) hehehehe
And now, as usual, i've made some step-by-step-wanna-be tutorials for you girls..
sorry if my step-by-step making never get any better each post hahaha
i really have no idea how to make it clear enough to be followed :p
TUXEDO STEP by STEP
COLLAR STEP by STEP
are they clear enough so you can make it also at home, girls? i hope so.. i really have nooo idea how to make the better one -_____-
so, have your nails neat and classy enough for their date? good luck on making your own Mr. Tuxedo and Ms. Collar :)
This post is
2012 nail
,
collar nails
,
korean style nails
,
nail arts
,
nailarts
,
paparazzi nails
,
pastel colored nailarts
,
pink
,
snsd
,
tuxedo nails
,
vintage nailarts
,
vintage nails
Selasa, 04 September 2012
Daisy Nails for My Blooming September
"The flowers that bloom in the spring,
Breathe promise of merry sunshine
As we merrily dance and we sing,
We welcome the hope that they bring,
Of a summer of roses and wine,
And that's what we mean when we say that a thing
Is welcome as flowers that bloom in the spring..."
Helloooo..
I cant belive it's September already and i've been in my 3rd year of studying architecture here.
And to start this new semester freshly, i wanna make my nails kinda flowering!
Since i get kind of nail-painting-addiction, i insist not to use any nail sticker but i wanna paint the flower by myself.
For the color, ummm, i think i still in love with pastel and pale colors.
and since i need some fresh touches, i decided give some yellow and pink here.
but i a lil bit confuse to choose the base color, i really want jaded and lily (it's mint and light purple) but i dont want to combine it at the same time, sooooo..
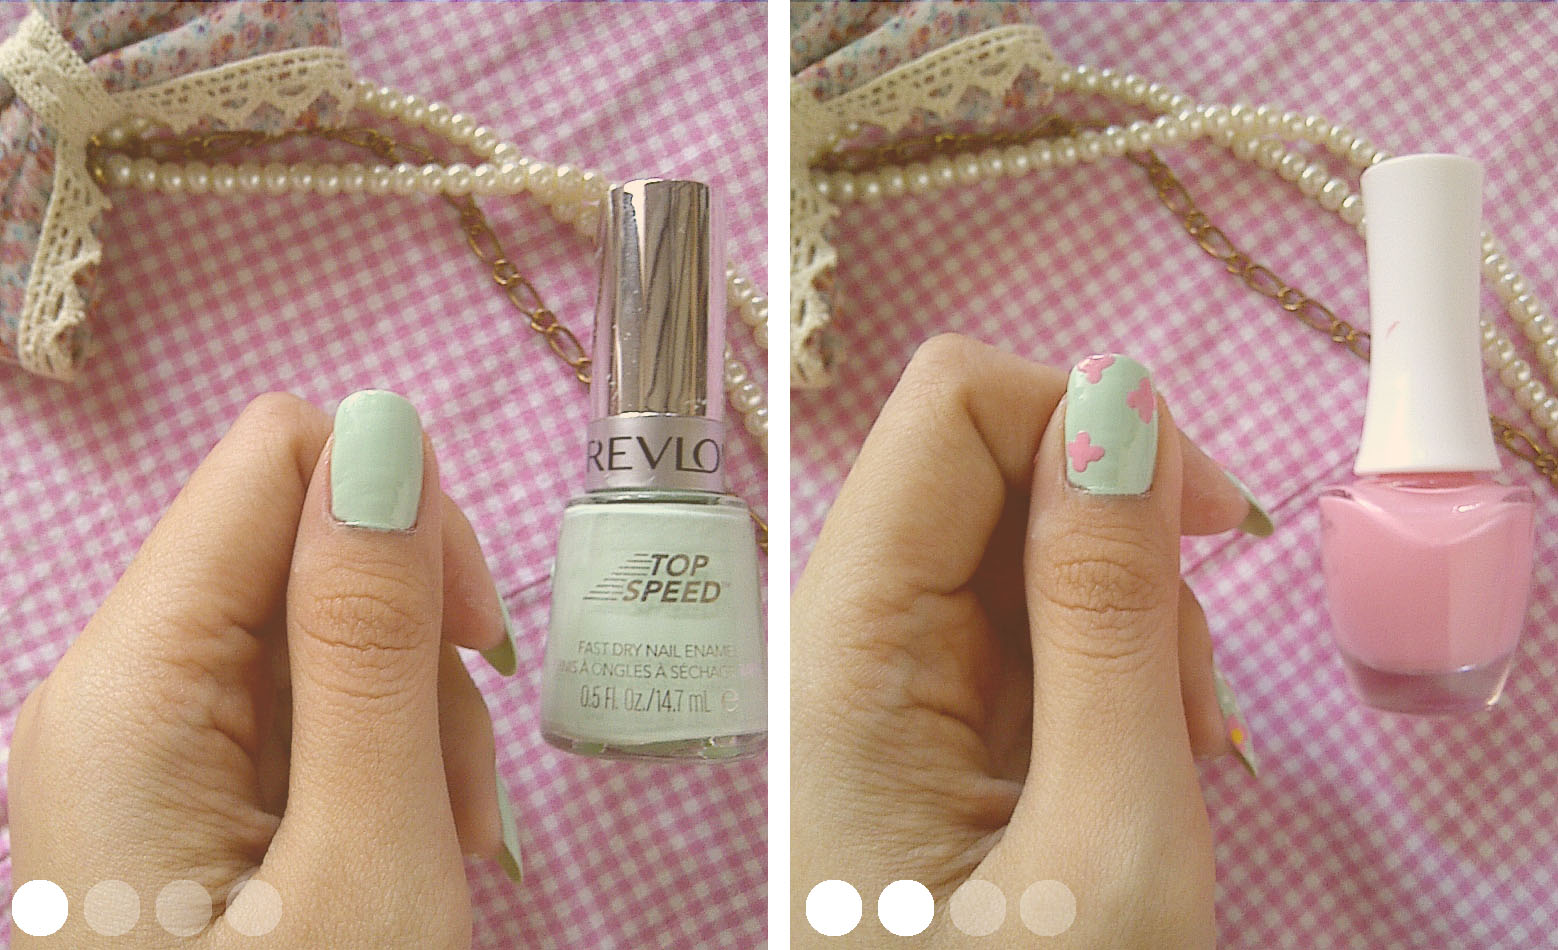
i make it in different time, first i make my daisy nails with Lily by Revlon .. it's sooooo calm and settle.
I really like it but i think it's still fresh-less, you know the color is too dreary.. it's kind of toneless..
but actually, overall, i loveeeee it !
Here my Lily Daisy Nails...
What i use to make my Lily Daisy Nails:
Base & Top Coat by Revlon | Lily by Revlon | Jaded by Revlon | Soft Pink by Face Shop | White by Stroberry
so, whatcha think? i think my Lily isn't that bad, it's just too toneless to call it "fresh-start"
and for the comparison, here, i proudly show you this!
My Jaded Daisy Nails...
What i use to make my Jaded Daisy Nails:
Base & Top Coat by Revlon | Jaded by Revlon | Electric Yellow by Revlon | Soft Pink by Face Shop | White by Stroberry
And this time i also make a simple step-by-step tutorial for you to make kinda this Daisy Nails just like mine :D
So, are you interested? Here are the Step-by-Step..
1. Apply the Base Coat and after 3 minutes it dries, apply the nail polish
that you want to make it as the base color for your daisy nails.
2. Make the petals by a dotting tool, the size is up to you, but i prefer to
make the little cute one, so in one nail i can make 2-3 flowers.
3. While waiting for the petals dry, make the white dots arround the flowers
to fill the void at the nails. I used the smallest dotting tools to make the
white dots.
4. After the petals dry, make the flower stalks in the midle of the petals.
the pink-yellow colors are beyond adorable awww :D
5. For the FINISH touch, apply the Top Coat, i'm using Revlon's Top
Coat. Still the best one i've ever try.
So, What do you think is the best? Or you just love both of them? eheheheh :p
Dont waste your time not to make it, girls.
Make one of it at your nails! Let em bring the flowers into your nails so you can feel the spring tide just by seeing your nails!
Happy September! <3
Breathe promise of merry sunshine
As we merrily dance and we sing,
We welcome the hope that they bring,
Of a summer of roses and wine,
And that's what we mean when we say that a thing
Is welcome as flowers that bloom in the spring..."
Helloooo..
I cant belive it's September already and i've been in my 3rd year of studying architecture here.
And to start this new semester freshly, i wanna make my nails kinda flowering!
Since i get kind of nail-painting-addiction, i insist not to use any nail sticker but i wanna paint the flower by myself.
For the color, ummm, i think i still in love with pastel and pale colors.
and since i need some fresh touches, i decided give some yellow and pink here.
but i a lil bit confuse to choose the base color, i really want jaded and lily (it's mint and light purple) but i dont want to combine it at the same time, sooooo..
i make it in different time, first i make my daisy nails with Lily by Revlon .. it's sooooo calm and settle.
I really like it but i think it's still fresh-less, you know the color is too dreary.. it's kind of toneless..
but actually, overall, i loveeeee it !
Here my Lily Daisy Nails...
What i use to make my Lily Daisy Nails:
Base & Top Coat by Revlon | Lily by Revlon | Jaded by Revlon | Soft Pink by Face Shop | White by Stroberry
so, whatcha think? i think my Lily isn't that bad, it's just too toneless to call it "fresh-start"
and for the comparison, here, i proudly show you this!
My Jaded Daisy Nails...
What i use to make my Jaded Daisy Nails:
Base & Top Coat by Revlon | Jaded by Revlon | Electric Yellow by Revlon | Soft Pink by Face Shop | White by Stroberry
And this time i also make a simple step-by-step tutorial for you to make kinda this Daisy Nails just like mine :D
So, are you interested? Here are the Step-by-Step..
1. Apply the Base Coat and after 3 minutes it dries, apply the nail polish
that you want to make it as the base color for your daisy nails.
2. Make the petals by a dotting tool, the size is up to you, but i prefer to
make the little cute one, so in one nail i can make 2-3 flowers.
3. While waiting for the petals dry, make the white dots arround the flowers
to fill the void at the nails. I used the smallest dotting tools to make the
white dots.
4. After the petals dry, make the flower stalks in the midle of the petals.
the pink-yellow colors are beyond adorable awww :D
5. For the FINISH touch, apply the Top Coat, i'm using Revlon's Top
Coat. Still the best one i've ever try.
So, What do you think is the best? Or you just love both of them? eheheheh :p
Dont waste your time not to make it, girls.
Make one of it at your nails! Let em bring the flowers into your nails so you can feel the spring tide just by seeing your nails!
Happy September! <3
This post is
2012 nail
,
blooming nails
,
blossom
,
daisy
,
daisy nails
,
floral nailarts
,
flower nailarts
,
korean style nails
,
nail arts
,
nailarts
,
pastel nailarts
,
september nails
,
spring
,
vintage nailarts
Langganan:
Postingan
(
Atom
)


.jpg)
.jpg)
.jpg)
.jpg)
.jpg)
.jpg)
.jpg)
.jpg)
.jpg)


.jpg)
.jpg)
.jpg)
.jpg)

.jpg)
.jpg)
.jpg)
.jpg)